Balsamic Roasted Strawberry Semifreddo with Pistachios

DSCN6667 You guys, I’m really good at procrastinating.  I’ll put things off for weeks or months (or years) at a time and chalk it up to all sorts of reasons.  I made recipes years ago that I swore would be posted to this site and have never made it up here.  This recipe is only a couple months old, so maybe I’m improving slightly (?).

I would like to think that my procrastinating ways are getting better with each year that I’m on this planet, but then I remember it’s been 4 weeks and I still haven’t called the insurance company like I need to so clearly I’m back at square one. But if square one involves roasted strawberries I’ll sit there for the next 10 years, pile those strawberries in my mouth, and call myself a satisfied procrastinator. Strawberries, Oil, VinegarLets talk about strawberries.  Oregon has the best strawberries, hands down, no argument.  If you can get fresh Oregon strawberries eat as many as your tummy will allow, and then start this recipe. DSCN6615 We’ll start by tossing fresh strawberries with balsamic vinegar, olive oil, maple syrup, and sea salt.  Strawberries go to the oven to get roasted until tender, sweet, and tangy.

Semifreddo base2

Heavy cream gets whipped and greek yogurt and sweetened condensed milk are stirred in.  That’s it… so simple!

DSCN6645 Now we assemble.  You’ll need a loaf pan, semifreddo base, roast strawberries and pistachios, plus a spoon for swirling. DSCN6648 Top your first layer of semifreddo with strawberries and pistachios.  Admire their beauty and then swirl together. DSCN6649 Keep layering until the loaf pan is full. Cover up with plastic wrap and freeze for at least 4 hours. DSCN6654 Now it’s time to scoop (or slice!). DSCN6655This is a low work/high reward type of recipe.   Super easy to make and incredibly delicious to eat.  The semifreddo is actually kind of light, but super creamy, and the pockets of roasted strawberry give a delightful pop to each bite.
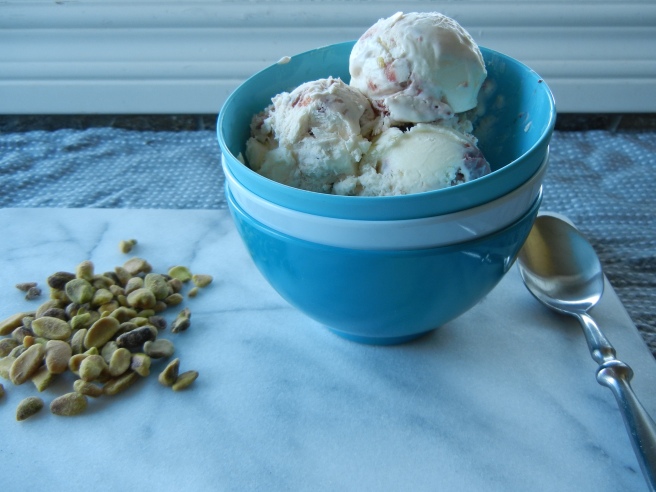
Lets make this semifreddo and procrastinate on the rest of life.  Because, why not?

Balsamic Roasted Strawberry Semifreddo with Pistachios

Makes 8 servings Semifreddo recipe adapted from Bon Appetit; Balsamic Roasted Strawberry recipe from Shutterbean

2 cups Heavy Whipping Cream

Pinch of Salt

2/3 cup Sweetened Condensed Milk

1/2 cup Plain Whole-Milk Greek Yogurt

1 recipe Balsamic Roasted Strawberries (recipe below)

1/2 cup Pistachios

In the bowl of an electric mixer fitted with a whisk attachment, whip heavy cream and salt until cream holds a medium stiff peak.  Stir in sweetened condensed milk and greek yogurt until combined. Place your first layer of semifreddo base in a loaf pan. Top with cooled, roasted strawberries and pistachios and swirl into semifreddo base.  Continue to layer and swirl until the loaf pan is full.  Top the semifreddo with plastic wrap and place in freezer at least 4 hours and up to 3 days. Scoop or slice semifreddo, top with pistachios and enjoy!

Balsamic Roasted Strawberries

1 lb strawberries, hulled and cut in half

4 Tbsp Maple Syrup

2 Tbsp Balsamic Vinegar

2 Tbsp Olive Oil

1/2 tsp Sea Salt

Preheat oven to 350 degrees.  Place strawberries is glass baking disk or baking a sheet lined with parchment paper. Whisk together maple syrup, balsamic vinegar, olive oil, and sea salt.  Pour balsamic mixture over strawberries and toss to coat. Roast strawberries for 40-45 minutes.  Let cool completely.

Flaxseed, Millet, and Black Pepper Crackers

How does time go so fast?  I can’t believe it is almost November already.  When I was a young child I remember things taking so long to occur.  All I wanted was for the day to be over so that I could put my halloween costume on and go fill my pillow case up with candy.  Hours passed slowly.  Days passed slower.  Weeks felt like years… especially when Christmas was involved.  Couldn’t we just make it so that everyday in December gave birth to baby Jesus?  And therefore presents… my little brain didn’t quite understand.

Now time seems to flash by, each year leaving me feeling a little bit farther behind in the things I’d like to do, make, see, and read.  There is balance that I’m slowly learning year by year.  Each season offers different adventures, and of course, we want to do them all.  But sometimes that gets overwhelming.  Sometimes that take the joy out of the experience because the doing becomes more important than the being.

All week long I’ve been thinking that I need to make doughnuts for this post.  That was my plan!  I had to get it done.  (And I really wanted a doughnut.. duh).  But as life was happening I began to slowly come to the reality that my time table was not going to work out.  There were old friends to be around and new friends to make.  There was work and workouts.  There was sleeping in a little bit later because its too dark in the morning to actually want to get out of bed.  Doing was not going to happen.  Being was a better idea.  Engaged in the life that was actually swirling around me as opposed to planning for the things that I need to get done.

 Can I real talk you for a second?  I actually made these crackers several months ago and have yet to share them with you all.  Thats real life.  I sort of got excited about other things and these took to the back burner.  Does that mean that weren’t that good?  Absolutely not!  They are full of flavor and texture, perfect on there own or accompanied with a creamy, salty cheese.

These crackers are relatively easy.  Butter gets cut into the dry ingredients which includes two types of flour, flaxseed meal, salt, pepper, baking soda, and millet seeds for an added crunch.

Buttermilk gives this flour/butter mixture a big drink and hydrates them all up!

After a few turns on the table and rest in the fridge, the dough is all set to be rolled out and cut into perfect circles.

A prick of the fork ends the process before the oven takes over, browning these crackers to oblivion.

As far as crackers go, I suppose these could be considered “healthy.”  Whole grains and millet seeds provide lots of fiber and flaxseed have the benefit of omega 3s.

I would mostly just consider them tasty.  The black pepper adds a great savory quality that I think would be offset perfectly with a creamy cows milk cheese and blackberry jam.

Thats just my imagination talking though.

Flaxseed and Black Pepper Crackers

Recipe slightly adapted from the Joy the Baker Cookbook

Ingredients

  • 1/4 cup millet seeds
  • 1/4 cup ground flaxseed meal
  • 1 cup whole wheat flour
  • 1/2 cup all-purpose flour
  • 1/2 teaspoon baking soda
  • 3/4 teaspoon salt
  • 3/4 teaspoon cracked black pepper
  • 2 tablespoon unsalted butter, cold, cut into cubes
  • 1/2 cup buttermilk

Directions

  1. Place rack in the center of the oven and preheat to 325 degrees.  Line 2 baking sheets with parchment paper or a silpat.  Set aside
  2. In a medium bowl, whisk together the flaxseed, flaxseed meal, flours, baking soda, salt and pepper.  Add the butter and work the butter into the flour using your fingers.
  3. Make a well in the center of the butter flour mixture.  Pour the buttermilk into the well and use a fork to bring the ingredients together.  All the dry ingredients should be moistened by the buttermilk.  The dough will be shaggy
  4. Turn the dough out onto a lightly floured work surface and knead together about 10 times to bring dough together.  Wrap in plastic wrap and refrigerate for 10 minutes.
  5. When chilled, cut dough in half.  Working with one half at a time, roll out dough on a lightly floured surface until it is about 1/8 inch thick.  Use a 1/2 inch round cookie cutter to cut out crackers.  Prick each cracker with a fork and place on prepared baking sheets.
  6. Bake crackers for about 15-18 minutes, until slightly browned on the edges.  Remove from the oven and allow to cool completely before placing in an airtight container.  Crackers will last for about 4 days stored in an airtight container at room temperature.  Makes about 4 dozen.

Squash, Pancetta, and Kale Stuffed Rolls

Notes to self:

1.  When you have hard a day eat grilled cheese and hang out with your bf and an old friend.  Laughter and full tummies are inevitable.

2.  Annie’s bunnies are dangerous.  Just because the box says “made with organic wheat” does not mean that they are calorie free.  Drop that second handful and let those bunnies live another day.

3.  Your Iphone is not essential for living.  You don’t have to check it every five minutes and its okay to just to sit (sometimes awkwardly) at a table by yourself without reaching for your phone.  No one posted a new picture on instagram.

4.  Remember this… “Gospel-humility is not needing to think about myself … true gospel-humility means I stop connecting every experience, every conversation with myself.  In fact, I stop thinking about myself.  The freedom of self-forgetfulness. … The truly gospel-humble person is a self-forgetful person whose ego is just like his or her toes.  It just works.  It does not draw attention to itself.”  (The Freedom of Self-Forgetfulness by Timothy Keller)

5.  When you are questioning what you are doing in life, job, relationships, etc. keep asking questions and keep seeking answers.

6. Stuffing delicious things inside of another delicious thing is always a good idea.

 Lets begin with something that makes everything better… carbs.

The roll part of this recipe is super simple.  Flour and salt make a small “well” in which the water, yeast, and sugar to mingle in.   Oil is added just before the ingredients are combined together.

  This is the dough after about 7 minutes of kneading.  It comes together nicely, although it will be a bit sticky.. thats normal though!  The dough gets placed in a well oiled bowl and covered with plastic wrap.  It sits for about an hour so that it can double in size.
 Acorn squash was cut in half, de-seeded, and roasted with a bit of olive oil and salt and pepper.  After is comes out of the oven use a spoon to scoop out the filling.

Let if cool first.  Or if your impatient you can burn your fingers like I did.
Other filling ingredients are onion, garlic, pancetta, kale, and ricotta cheese.

Its a good balance of good for your guts and good for your (taste) buds.    This all started with the pancetta.  Pancetta is basically the Italian form of bacon.  Its not as smoky as bacon so if you like that smoky get your bacon on.

The rest of the ingredients are sauteed in the pancetta grease.  Recycling at it finest.

 Here is the dough post.

I hadn’t made bread in a while so I forgot the dreamy, silky texture of risen dough… so fantastic

I bet this is what Jesus’ skin felt like after he came out of the tomb… you know, bread of life and all.
  This is the semi-tricky part.  A dollop of filling goes onto eat square of dough.  Then you take opposite corners of the dough and pinch them together, making sure there are no holes in the dough.

Pro-tip:  To get the rolls round, make a C around the ball of dough while its sitting on the counter.  Make a circular motion with your hand, while spinning the roll within that C shape part of your hand.  This should help make the roll round and seal seams in the bottom.
Each roll takes its place in line all bunched up next to the other.  Egg wash is a must if you want that deep golden brown color after the rolls are baked.

Just whisk an egg with a fork and use a pastry brush, or even your fingers, to paint the top of the rolls with a coat of egg wash.

Next, these beauties are baked and eaten.  An unsuspecting dinner roll surprises the unknowing when they bite into bread and find nutty acorn squash, salty pancetta, savory onion, flecks of green kale.

My boyfriend intended to eat 1 then had 3 and finished with 5… I’ll take that as a good sign.

Squash, Pancetta, and Kale Stuffed Rolls

Inspired by Baker and Spice Bakery; dough recipe from Girl versus Dough

Ingredients

Dough

  • 3 cups unbleached all-purpose flour
  • 3/4 cup whole wheat flour
  • 1 1/2 teaspoons salt
  • 1 1/3 cups warm water (~115 degrees F)
  • 1 tablespoon granulated sugar
  • 2 1/4 teaspoons (1 packet) active dry yeast
  • 3 tablespoons olive oil

Filling

  • 1 acorn squash, cut in half and deseeded
  • 4 oz pancetta, finely chopped
  • 1/4 cup onion
  • 11/2 cups dino kale, chopped or torn into small pieces
  • 2 cloves garlic
  • 1/3 cup ricotta cheese
  • 1 tsp olive oil
  • salt
  • pepper
  • Dash of thyme and rosemary

Directions

  1. Preheat oven to 400 degrees.  Prepare a baking sheet by lining it with parchment paper or a silpat silicone liner.
  2. Brush both halves of the acorn squash with olive oil.  Sprinkle with salt and pepper and roast for about 30 minutes, until squash is tender when poked with a fork.  Let cool for about 10 minutes.  Use a spoon to remove the meat of the squash from the skin.  Cut squash meat into small cubes and set aside.
  3. Dough:  In a large bowl, whisk together flour and salt.  Make a well in the center of the flour mixture.  Pour water, yeast, and sugar into the flour well.  Let stand until yeast is foamy, about 5 minutes.  Add olive oil and mix until just combined.
  4. On a lightly floured surface knead dough, adding flour when necessary, until dough is smooth and elastic, about 10 minutes.  Alternatively, place dough into the bowl of an electric mixer fitted with the dough hook attachment and knead until dough is smooth and elastic, about 5 minutes.
  5. Place dough in a lightly oiled bowl and coat with a bit of olive oil.  Cover with plastic wrap and let rise in a warm room for 1 hour, until doubled in size.
  6. Meanwhile make the filling:  Heat a medium skillet over medium heat.  Add pancetta and cook until just starting to brown.  Add onion and continue to cook until onion is translucent.  Add kale and garlic and cook until kale has wilted down.  Add cubed squash and stir to combine ingredients.  Using the back of a fork, smash some of the squash while leaving other pieces whole.  Stir in the ricotta until combined.  Add thyme and rosemary.  Salt and pepper filling to taste.
  7. Prepare a baking 9×13 in baking dish by lightly greasing it.  When dough has doubled in size, punch down, remove from bowl and roll out on a lightly floured surface into a rectangle about 12×15 inches.
  8. Cut the rectangle of dough into 15 squares.  Spoon filling onto the center of each square.  Make sure to use up all the filling.  Lift up the four corners of the dough and pinch to seal.  Seal any remaining openings.  Place roll seam side down in prepared baking dish.  Repeat with remaining pieces of dough.
  9. Brush rolls with egg wash and sprinkle with sea salt.  Bake rolls until they are a deep golden brown about 15-20 minutes.  Remove rolls from oven and let cool slightly.  Serve warm.

Pumpkin Smoothie

What. is. up?

I was just about to tell you all about the person I’m mad at, the situations I’m frustrated with, and things I’m worried over.  Thats lame though, and really, I don’t think you wanna hear about it.

Instead, I’ll tell you this…

Love well today.  Be grateful for the sunshine.  Delight in the clouds.  Rest in the truth that you are loved.  Share your heart with the people around you.  Be vulnerable enough to real talk a couple of conversations.  Walk into your fear.  Confront what challenges you.  Tell five people you appreciate them.  Find meaning in the silence.
Go for a walk.  Crunch fallen leaves under your feet.  Drink water.  Don’t beat yourself up.  And make a smoothie.

A pumpkin smoothie, of course.  Super simple and full of good for you ingredients.

Literally, it takes less than five minutes to make this smoothie.  All the ingredients blend perfectly into a cold, fall beverage without the guilt (or cost) of a pumpkin frappe.  Winning.

Happy Friday!

Don’t forget to give the next person you see a high five/fist bump… whichever you prefer.

Pumpkin Smoothie

Adapted from Lululemon Blog

Ingredients

  • 1/2 cup pumpkin
  • 1/2 banana
  • 1 scoop chocolate protein powder (you can also use vanilla)
  • 1 tsp vanilla extract
  • 1/8 tsp cinnamon
  • 3/4 cup almond milk
  • Toasted pecans, optional

Directions

  1. Place pumpkin, banana, protein powder, vanilla extract, cinnamon, and almond milk in a blender with a few ice cubes.  Blend until smooth.
  2. Pour smoothie into a glass.  Top with cinnamon and toast pecans.
  3. Now drink it like nobody’s business.

Bacon Chocolate Chip Cookies

Brother:  Hey Kayla do you think we could make chocolate chip cookies and put bacon in them?

Me: Uhhh, yeah.  Definitely.

Brother:  Cool. 

Yep, that simple convo is how it started.  A little flicker of an idea in that big guy’s head and our baking adventure began.  I think this was the first time I’ve ever baked with my brother.  Sure we’d made dinner together a time or two when we both lived in California.  I’d come over to his house and we would work our way through our mom’s green chile chicken enchilada recipe, but baking?  Nope… that has always been my job.

His number one request is always chocolate chip cookies.  Always, always, and always.  I bet he could eat an entire batch in one sitting… but I think I could too so I’m not that impressed.

Of course, I have baked for him many, many times.  But he never makes much more than burnt popcorn for me.  Wah wahhh.   So naturally I figured his spark of bacon genius would leave me to do the “work” and he would be left with a very tasty reward.  Not that I mind making the cookies it’s just the fairness factor between siblings that is stuck in the back of my mind.  Example:

Brother: Hey Kayla can you get me some water?

Me:  Yeah, next time I get up from the same couch you are on and go to the kitchen I’ll get you one.

…. the next day

Me: Nick can you grab me a kleenex… they’re right there next to you.

Brother: (walks over to the couch) Did you want me to get you something?

This is just one example of a give and take imbalance in this relationship.

To my surprise he helped me out in the end.  I watched, very carefully and slightly controllingly (is that a word? Nope.), as he measured the flour, sugar, baking soda, and salt.  I may have hovered over his shoulder a little bit as he creamed the butter and sugar.  I definitely had to help him put the food processor on the right way.

But really, he helped a lot.  And I really enjoyed it.

Especially when he did the dishes. (what?!)

When the timer went off we were both anticipating what was to come.  Would they taste good?  Would it just be weird?  Too much bacon?  Or worse, not enough?

In the end, and after several taster cookies, I decided that they were perfect for my mouth buds.  I like the subtle salty, smoky flavor that sneaks up on your taste buds.  Since the bacon is ground into small pieces each bite is flecked with a few bacon-y gems.  Not overwhelming but noticeable.  I still feel like I’m eating a choco chip cookie, which was important to me.

I give a high five to the man with idea… Nick, you did well.

Now go to the gym…

Bacon Chocolate Chip Cookies

Recipe adapted from nestle tollhouse

Ingredients

  • 2 1/2 cups flour
  • 1 teaspoon baking soda
  • 1 teaspoon salt
  • 1 cup (2 sticks) butter, softened
  • 3/4 cup sugar
  • 3/4 cup brown sugar
  • 2 eggs
  • 2 cups semisweet chocolate chips (I used Guittard)
  • 1/2 pound bacon, cooked

Directions

  1. Preheat oven to 375 degrees.  Line a baking sheet with parchment paper or a silpat liner.
  2. In a food processor, grind bacon into small pieces about the size of a pebble.  Set aside.
  3. In a small bowl, whisk together flour, baking soda, and salt.
  4. In a large bowl or the bowl of an electric mixer, cream the butter, sugar, and brown sugar until light and fluffy, about 3 minutes.
  5. One at a time add the eggs to the butter and sugar mixture until fully incorporated, making sure to scrape down the sides of the bowl.
  6. Pour flour mixture into butter mixture and stir until combined.
  7. Add chocolate chips and bacon stirring until fully incorporated.
  8. Using a small ice cream scoop or a large spoon drop about a tablespoon of dough onto the baking sheet.
  9. Place in the oven and bake until golden brown, about 9-10 minutes.
  10. Remove from oven and let cool on baking sheet for 3-5 minutes.  Transfer cookies to wire rack to cool completely.  Or eat one right away when its still warm!

*Store in an airtight container for up to 3 days.  Have leftovers?  Freeze them!

Arugula Walnut Pesto

Lets start the week out with something green.  Lets start the week out with vegetables and healthy fats.  Lets start the week with a pop of flavor.

They (whoever “they” are) say you eat with your eyes first.  Green as grass arugula pesto is not only appealing to eye, but easy to make and incredibly versatile.  Arugula’s natural peppery flavor and a salty bite from the parmigiano reggiano lends itself well to a multitude of dishes.  This pesto can be used up right away or frozen for the future.

I’ve collected a few recipes from around the web that utilize arugula pesto in tasty ways.  Try one of them out or make up your own combination.  Let me know what you do!

I love the colors of this mac and cheese.  It almost makes it feel healthy with all that green… almost

This would be a great salad to make for lunch.  Wheat berries have a slightly chewy texture with a nutty finish.  Perfect with a peppery pesto.

Pesto on your pizza?  Its a great way to switch up your pizza toppings and add new flavors in the mix.  I’ll take two slices right now.. thank you

If you’re looking for an easy week night dinner just grill up some chicken and top it with pesto.  Simple and delicious!

This is a great dish for when company comes over.  It looks impressive and you won’t have to spend hours in the kitchen.  Look at those colors!

Arugula Walnut Pesto

Recipe adapted from Rachael Ray

Ingredients

  • 1/2 cup extra virgin olive oil
  • 1 cup grated Parmigiano Reggiano
  • 1/2 cup walnut pieces or 2/3 cup walnut halves, toasted
  • 1- 10 oz bag of arugula
  • salt and freshly ground pepper

Directions

  1. Place olive oil, parmigiano reggiano, walnuts, arugula, salt, and pepper in a food processor.  Process until all ingredients are ground into a thick, smooth paste.  Thats it.. you’re done!
  2. Store in an airtight container in the refrigerator for up to 4 days or freeze to use later.

{Chocolate Coconut} Peanut Butter Banana Bread


Oh man.  I am ready for the weekend.  This week and last have been one of those I-just-want-to-crawl-in-a-hole-as-fast-as-possible weeks.  I’ve messed up what seems like a million times at work this past week or so and it is so frustrating.  I just want to punch myself in the face.  Not really though.

Okay, maybe a little bit.

As a slight perfectionist, I find it quite difficult to make mistake after mistake, especially when you aren’t the only one having to bear the consequences of those mess ups.  My boss is completely nice about it but I hate that feeling of “letting them down.”  And I have a ridiculous time letting it go.  All last weekend my mind would wander toward what I did wrong at work, how I could’ve fixed it, what my co-workers were thinking/saying about me, how I could make it right… My mind would not stop going there.  I was worrying about a situation that I had no current control over, and fretting about mishaps that I couldn’t take back.

It’s true that we have to live with the decisions that we make, or the things we do wrong, no matter how big or insignificant they may be, but there is a point when living with it can cross over to being consumed by it, and I have been consumed.  I find myself being swallowed up by my own thoughts, concerns, future projections, and other’s opinions quite a lot.  I take myself out of the current moment to instead be in a negative space that leads me nowhere.

There is a point where I must remind myself that I am human, I will make mistakes, I will learn as best I can to avoid doing them again and I will let. it. go.

Then I will reward myself with a high five and a slice of chocolate coconut  peanut butter banana bread… whew thats a mouth full.

Let take a quick second to talk about this peanut butter.  Its…  just really delicious.

What could go wrong with chocolate and coconut swirled into creamy peanut butter?  Nothing, thats what.  Absolutely nothing.

Well, except maybe my waning self control once I hold this jar of pb in one hand and a spoon in the other.   I’ll just consider that a tasty mishap.

Okay, here’s the deal.  Quick breads are fantastic for many reasons.  They are very versatile, quick to put together, hard to screw up, and freeze well.  Plus they are delicious.

All you really need are two bowls.  Whisk together your dry ingredients first.  Whisking them before adding them to the wet ingredients ensures that everything is equally distributed.

Next, things start to get wet and wild.  Sugar and eggs are whisked into a lovely mixture.  Add bananas, yogurt, melted coconut oil, and peanut butter.  Things start to get really crazy when the sugar, banana, peanut butter situation invites the dry ingredients into the party.  They mingle and turn into a silky batter ready to be baked.

But first generous dollop of peanut butter gets swirled into the batter.  You can always leave this step out and the bread will still be delicious… but, really, why would you?

Here it is.  A version of banana bread that you will come back to again and again.  The flavors are well balanced, playing nicely and sharing the spotlight.

The peanut butter and banana combo is an obvious win.  The addition of chocolate and coconut are like the moment you get the win, rip your shirt off, and fall on the grass in just your sports bra.

Thats a bad comparison…  does anyone even remember that?

Oh well, make this bread and your tummy will be happy… high five!

{Chocolate Coconut} Peanut Butter Banana Bread

Slightly adapted from Joy the Baker

Ingredients

  • 11/2 cups bananas, mashed
  • 1/3 cup greek yogurt
  • 1/3 cup chocolate coconut peanut butter, or any other nut butter
  • 3 tablespoons coconut oil, melted
  • 2 large eggs
  • 1/2 cup sugar
  • 1/2 cup brown sugar
  • 1 cup whole wheat flour
  • 1/2 cup all purpose flour
  • 1/4 cup flaxseed meal
  • 3/4 teaspoon baking soda
  • 1/2 teaspoon slat
  • 1/2 teaspoon cinnamon
  • 1/8 teaspoon allspice

Directions

  1. Preheat oven to 350 degrees.  Butter one 9×5 in loaf pan or 3 6×3.5 loaf pans (this is what I did).  Set aside.
  2. In a small bowl whisk together whole wheat flour, all purpose flour, flax seed meal, baking soda, salt, cinnamon, and allspice.
  3. In a large bowl, whisk together sugar, brown sugar, and eggs until well incorporated. Add yogurt, bananas, peanut butter, and coconut oil.  Whisk to combine.
  4. Pour flour mixture into the banana mixture and stir until just combined.  Don’t over mix!
  5. Pour batter into loaf pan(s), about 3/4 of the way of the pan.
  6. Optional: Put three dollops of softened peanut butter on top of the batter.  Swirl into the batter with a toothpick, skewer, or knife.
  7. Place in oven and bake for 45-60 minutes (if you are just using one large loaf pan it will be more on the 60 minute range.. opposite for the smaller pans!).  Test to see if the bread is down by placing a toothpick in the center and having it come out clean.
  8. Remove from oven and let cool in pan for for about 20 minutes.  Run a butter knife along the edges to invert from pan and let cool completely on a wire rack.

Bread will last well wrapped for up to 4 days at room temperature.  Alternately it can be stored in the freezer for a rainy day or just a crappy work week.

Blueberry Pie Bars

Hi Friends!

Can I just say that I am really enjoying the cooler weather?  I was actually excited when I woke up a couple days this past week and the gray wall of clouds hid the sun and a slight mist dotted my windows.  It seemed refreshing.. and oddly comforting.

Portland must be changing me if I’m pining for cool weather and clouds instead of an extended stay of sunshine.  Next thing I know I’ll give up my umbrella completely, because we all know that a true Pacific Northwesterner does NOT use an umbrella.  Frankly, I’d rather not get my shoes wet.  The umbrella will stay for now.

On a completely different note, do you ever have those days when you just want to eat everything in sight?  Me too.

Scone for breakfast?  Sure!  Giant chocolate chip cookie?  Why the heck not?  Part of my BF’s salty cheesy quesadilla?  I better at least have one bite…

Sometimes you just need an eat day.  Sometimes you need to treat yo self!

Fall is officially here, but summer bounty is still holdin on by its finger tips.  Lets just keep buying berries as long as we can.  Lets buy berries and freeze them, can them, eat them fresh.  Lets buy berries and make pie with them.  Lets buy berries and have an EAT day.

These blueberry pie bars are a sweet treat that will leave you hopped up on sugar and ready to tackle anything (until you crash 3 hours later).  Just kidding…  Sort of.

These bars start off with a brow sugary oatmeal crust.  A dash of cinnamon gives them some warmth and that familiar pie flavor.

Butter is a delicious, necessary ingredient.  It gets cut into the dry ingredients until the dough forms into large chunks.

Blueberries are the star ingredient, and rightfully so.  Their deep blue colors turn royal purple after a trip to the oven, and fresh summer blueberries offer the right sweet to tart ratio.  I used fresh but frozen is definitely an option as well!

Cinnamon and brown sugar along with a little flour are mixed with berries.  Lemon zest gives these bars a much needed pop of freshness.

A little bit of the crust is set aside while the remaining gets pressed into the pan.  Top that with the berries and crumble the rest of the crust on top.

Then they take a little trip to the oven.

I’m not gonna lie, these pie bars are sweet, and a little square goes a long way.  I might try reducing the brown sugar next time I make them, or using another type of fruit (Deb used raspberries in the original).

Have an eat day now or freeze some for a rainy day.  Either way, you’ll be glad these are in your tummy.

Blueberry Pie Bars

Recipe slightly adapted from Smitten Kitchen

Ingredients

For the crust and crumb:

  • 1 1/2 cups all-purpose flour
  • 1 cup firmly packed dark brown sugar
  • 1 1/4 cups rolled oats
  • 3/4 teaspoon salt
  • 3/4 teaspoon baking powder
  • 1/2 teaspoon baking soda
  • 1/2 teaspoon cinnamon
  • 3/4 cup (1 1/2 sticks) unsalted butter, cut into 1-inch pieces

For the blueberry filling:

  • 1/4 cup firmly packed dark brown sugar
  • 1 tablespoon grated lemon zest
  • 1/2 teaspoon cinnamon
  • 2 tablespoons all-purpose flour
  • 1 pound blueberries, fresh or frozen
  • 1/4 cup fresh lemon juice
  • 2 tablespoons unsalted butter, melted and cooled

Directions

  1. Preheat the oven to 350°F. Butter the bottom and sides of a 9-by-13-inch glass or light-colored metal baking pan. Put a long piece of parchment paper in the bottom of the pan, letting the parchment extend up the two short sides of the pan and overhang slightly on both ends. (This will make it easy to remove the bars from the pan after they have baked.) Butter the parchment.
  2. Put the flour, brown sugar, oats, salt, baking powder, baking soda, and cinnamon in a food processor. Pulse in short bursts until combined. Add the butter and pulse until loose crumbs form.
  3. Reserve 1 1/2 cup of the mixture and set aside. (Note: The book suggests you reserve one cup only.  Pour the rest of the mixture into the prepared pan and use your hans or the back of a large wooden spoon to push the crust into an even layer at the bottom of the pan. The crust should touch the sides of the pan. Bake until golden brown, 12 to 15 minutes. Transfer to a wire rack and let the crust cool. Keep the oven on while you make the raspberry filling.
  4. Make the blueberry filling: In a medium bowl, whisk the sugar, lemon zest, cinnamon and flour together. Add the raspberries, lemon juice and butter and use your hands to toss gently until the blueberries are evenly coated.
  5. Assemble and bake the bars: Spread the blueberry filling evenly on top of the cooled crust. Sprinkle the reserved crust mixture evenly on top of the filling.
  6. Bake for 35 to 45 minutes, rotating the pan every 15 minutes, until the top is golden brown and the filling starts to bubble around the edges.
  7. Transfer to a wire rack to cool completely, then cut into squares and serve. The bars can be stored in the refrigerator in an airtight container for up to two days.

A Look Back- Summer Livin

I’m taking a look back at summer 2012.  It was filled with travels, milestones, new adventures, new friends and lots of good food.
Come take a look!

My summer started off great with a little jaunt across the Atlantic.  I took my passport and hopped on a plane to Berlin with my BF, his brother, and his brothers GF.
We saw the Berlin Wall in a walking tour around Berlin.  In Prague we went to the beautiful St. Vitus Cathedral and sipped on coffee in the Old Town Square.  We rode the train from city to city, passing by beautiful fields of yellow.  We stayed across from and saw an Opera at the Staatsoper in Vienna.
We ate lots of food… of course!  Gelato was a great afternoon snack in Prague.  Lemon sorbet was a (very delicious) palate cleansers at a Italian influenced dinner.  Beer gardens in Prague and Munich made for a great afternoon break.  Bread and cheese from the Naschmarkt was the perfect lunch after our arrival in Vienna.  Coffee was a daily occurrence.  But the fragilite from Demel Pastry Shop in Vienna was by far my favorite treat of the trip!
I started two jobs this summer.  One at a gym.  The other at a podiatrist office.  I’ve taught people how to squat and lunge.  I’ve learned lots about natural foot health.  (Correct Toes are a miracle worker and shoes should be flat, wide, and flexible… just so you know)
I graduated from college!  So did Mirjam and Lisa.  We were all very excited in our square hats and giant gowns.
I saw the great outdoors.
I went to Mount Saint Helens.  I hiked to the top of peaks to see incredible views of Mt. Hood.  I saw the Columbia River Gorge in all its glory.  I took strolls through the park.  And I walked across suspension bridges.
I ate foods.
Pizza at Nostrana.  Salt and Straw ice cream.  Bone marrow and pretzel toast.  Kale salad from Caveman Cart.  TWO double yolk eggs (that never happens!).  A paleo picnic breakfast in the park.  S’mores deconstructed with a side of bourbon.  Shrimp and veggie skewers for dinner on the deck.
Its been a good eating summer!
I drank drinks!
Brew fest was fun and raspberry beer was my fav.  Red wine with JoJo B on NW 23rd.  Gin and tonic at the Mansion.  Purple haze with my mom.  Margaritas on the rocks.
I took another trip this summer.
I headed North to Canada with my momma.
We got on a boat to Victoria, BC.
We went whale watching on a small boat.  It was crazy cold and we were all just as excited as a kid at Disneyland when we saw the whales.
Butchart gardens was beautiful and unique.  After a stroll through the gardens we had ginger orange scones at high tea.
We stayed at Abbeymoore Manor, a beautiful bed and breakfast run by the nicest people! The mornings were enjoyed with a cup of coffee while we ate homemade breakfast.
The harbor was filled with boats and the sky filled with clouds!
I became obsessed with three things.
Chocolate popsicles.  Bing cherries.  Annie’s bunnies.
Boom Boom Pow!
I got my nails done did.
I blazed like nobodies blazeness.
I yolo’d a haircut.
I also listened to lots of JtB and Shutts
I found this old picture of my family vacation.  We were in Hawaii.  And, obviously, we were thrilled.
This picture continues to make me laugh… every time I see it.  I have got to get back into lady bugs…
 All in all, my summer was great summer.  Tell me about yours!
P.S. I am now ready for bright colored leaves, cool autumn breezes, and comfy sweaters.

Nectarine Huckleberry Tart

I often think way too much about what others think of me.  My decisions, my actions, my thoughts so quickly go toward what the person next to me is thinking.  I get taken captive, in a sense, by the possible judgement or objection of somebody else’s thinking, someone else’s moral compass, someone else’s way of doing things, someone else’s opinion.

I decide things based on what I believe other people would like.  I look for approval. I want someone else’s “okay.”  I look to someone else to validate me.

I was reminded last week that everyone has some kind of ugly baggage that they are carrying around with them.  Or even just a part of their life that they think others might label as wrong or weird or what have you.

I was reminded that those people I am so worried about are just like me.  No better.  No worse.  We are on equal ground.

I can live my life even when someone disagrees.

Sigh.

This past week I decided to make a tart.  This tart took forever to decide upon because I was worried about how it would turn out.  And I was worried about that because I was taking it to a work bbq and I wanted everyone there to like.

I really get ridiculous sometimes.  I mean who doesn’t like a buttery crust topped with fruit?  Someone, I am sure of it.

The crust for this tart is super simple.  Flour, almond, and butter get weighed and measured.  Then lemon zest is mixed into the sugar.  This helps release the oils in the zest which means a more pronounce lemon flavor in the final product.

All of these ingredients are worked together until the flour is completely incorporated and the dough is crumbly. The dough is then pressed into a tart pan.

Just use your fingers thats definitely the best way to do it.

Huckleberries, which I proudly picked myself, are rinsed and dried off a bit.

Deliciously fragrant nectarines are split open and cut into small wedges.

Take a minute to admire the gorgeous fruit!  Such brilliant colors…

Huckleberries go in first.  Nectarines are layered on top.  I start around the outside edge first and move toward the center.  It doesn’t have to be perfect… quit caring about what other people will think. (I’m talking to myself here)

Now, bake that beauty!

I absolutely love the colors of this tart after its been baked.  Deep purple, mauve, and taupe.  Perfect.

I have to say this tart was a success.  There is a thick layer of lemony crust, which I greatly appreciate.  A touch of cinnamon adds a warmth to the sweet nectarines and tart huckleberries.  A scoop of gelato is a nice touch… just a suggestion.

And yes, the co-workers thought it was delicious.

Nectarine Huckleberry Tart

Recipe from Pease Pudding

Ingredients

  • 1 1/2 cups flour
  • 3/4 cup sliced almonds, crushed or use almond meal
  • 2 teaspoons baking powder
  • 1/2 teaspoon salt
  • 1/2 cup sugar
  • 1/2 cup plus 6 tablespoons butter, cubed
  • zest of one lemon
  • 4 nectarines, pitted and quartered
  • 1/2 cup huckleberries
  • 1/2 tablespoon cinnamon
  • 1 tablespoon brown sugar

Directions

  1. Preheat oven to 325 degrees.  Butter or spray a 9 1/2 inch removable bottom tart pan. Set aside.
  2. In a small bowl mix the lemon zest into the sugar until its incorporated well.
  3. In a medium bowl whisk together the flour, baking powder, and salt.  Mix in the almonds and sugar.
  4. Add the butter to the dry ingredients.  Using your fingers, cut the butter into the flour mixture and continue to mix just until flour is incorporated.  Dough should be clumpy not one solid ball.
  5. Dump the dough into the prepared tart pan and press dough into pan using your fingers or the flat bottom of a cup.  The dough should be flush with the top of the pan.  Place tart crust in freezer while you prepare the fruit.
  6. In a medium bowl, gently mix together the nectarines, cinnamon, and brown sugar.  Let sit for a few minutes to release some of the juices of the fruit.
  7. Remove crust from freezer and sprinkle the huckleberries on top of the crust so that they lie in one single layer.
  8. Beginning with the outer edge place the nectarines along the whole outside edge of the tart pan.  Continue this process until the crust in filled with nectarines.
  9. Bake tart for about 40 minutes or until the edge of the crust is browned slightly.
  10. Remove from oven and let cool on a wire rack or at least 10 minutes.  Serve warm or cooled… both are delicious!